一、软件概述
 [root@webserver ~]# cat /etc/redhat-release
CentOS Linux release 7.2.1511 (Core)
 [root@webserver ~]# uname -r
3.10.0-327.el7.x86_64
 [root@webserver ~]# nginx  -V
nginx version: nginx/1.10.3
二、软件安装
1. 通过yum安装必要的开发包到操作系统
 [root@webserver ~]# yum install -y gcc gcc-c++ autoconf libjpeg libjpeg-devel libpng libpng-devel freetype freetype-devel libxml2 libxml2-devel zlib zlib-devel glibc glibc-devel \
 glib2 glib2-devel bzip2 bzip2-devel ncurses ncurses-devel curl curl-devel ssse2fsprogs e2fsprogs-devel krb5 krb5-devel libidn libidn-devel openssl openssl-devel openldap \
 openldap-devel nss_ldap openldap-clients openldap-servers ncurses ncurses-devel curl curl-devel gd libtool libtool-libs kernel-devel autoconf fontconfig-devel libXpm-devel \
 php-mcrypt libmcrypt-devel
2. 安装nginx
 [root@webserver ~]# cd /usr/local/src/
 [root@webserver /usr/local/src]# wget https://www.openssl.org/source/openssl-1.1.0b.tar.gz
 [root@webserver /usr/local/src]# tar xf openssl-1.1.0b.tar.gz
[root@webserver /usr/local/src]# cd
 [root@webserver ~]# groupadd nginx
 [root@webserver ~]# useradd -g nginx -d /usr/local/nginx -s /sbin/nologin nginx
 [root@webserver ~]# wget http://nginx.org/download/nginx-1.10.3.tar.gz
 [root@webserver ~]# tar xf nginx-1.10.3.tar.gz
 [root@webserver ~]# cd nginx-1.10.3/
 [root@webserver ~/nginx-1.10.3]#  ./configure --prefix=/etc/nginx --sbin-path=/usr/sbin/nginx --conf-path=/etc/nginx/nginx.conf --error-log-path=/var/log/nginx/error.log \
  --http-log-path=/var/log/nginx/access.log --pid-path=/var/run/nginx.pid --lock-path=/var/run/nginx.lock --user=nginx --group=nginx --with-http_ssl_module \
  --with-http_realip_module --with-http_addition_module --with-http_sub_module --with-http_dav_module --with-http_flv_module --with-http_gunzip_module \
  --with-http_gzip_static_module --with-http_random_index_module --with-http_secure_link_module --with-http_stub_status_module --with-http_auth_request_module \
  --with-mail --with-mail_ssl_module --with-file-aio --with-ipv6 --with-openssl=/usr/local/src/openssl-1.1.0b --with-http_v2_module
 [root@webserver ~/nginx-1.10.3]# make
 [root@webserver ~/nginx-1.10.3]# make install
 [root@webserver ~]# nginx
 [root@webserver ~]# netstat -lntp
Active Internet connections (only servers)
Proto Recv-Q Send-Q Local Address           Foreign Address         State       PID/Program name
tcp        0      0 0.0.0.0:80              0.0.0.0:*               LISTEN      28380/nginx: master
tcp        0      0 0.0.0.0:22              0.0.0.0:*               LISTEN      832/sshd
tcp        0      0 0.0.0.0:10050           0.0.0.0:*               LISTEN      840/zabbix_agentd
tcp6       0      0 :::22                   :::*                    LISTEN      832/sshd
tcp6       0      0 :::10050                :::*                    LISTEN      840/zabbix_agentd
3. yum安装mariadb,如果要安装MySQL,请参照下面链接:
https://www.cnblogs.com/cyleon/p/10040728.html
[root@webserver ~]# yum install mariadb mariadb-server mariadb-devel -y
4. 安装PHP
A. 下载安装libmcrypt库(加密算法扩展)
[root@webserver ~]#wget http://sourceforge.net/projects/mcrypt/files/Libmcrypt/2.5.8/libmcrypt-2.5.8.tar.bz2
[root@webserver ~]#tar xf libmcrypt-2.5.8.tar.bz2
[root@webserver ~]#cd libmcrypt-2.5.8/
[root@webserver libmcrypt-2.5.8~]#./configure && make && make install
B. 下载安装mhash库(提供了一个统一的接口,有大量的哈希算法)
 [root@webserver ~]# wget https://jaist.dl.sourceforge.net/project/mhash/mhash/0.9.9.9/mhash-0.9.9.9.tar.gz
 [root@webserver ~]# tar xf mhash-0.9.9.9.tar.gz -C /usr/local/src/
 [root@webserver ~]# cd /usr/local/src/mhash-0.9.9.9/
 [root@webserver /usr/local/src/mhash-0.9.9.9]# ./configure && make && make install
C. 创建软链接
 [root@webserver ~]# ln -s /usr/local/lib/libmcrypt.la /usr/lib64/libmcrypt.la
 [root@webserver ~]# ln -s /usr/local/lib/libmcrypt.so /usr/lib64/libmcrypt.so
 [root@webserver ~]# ln -s /usr/local/lib/libmcrypt.so.4 /usr/lib64/libmcrypt.so.4
 [root@webserver ~]# ln -s /usr/local/lib/libmcrypt.so.4.4.8 /usr/lib64/libmcrypt.so.4.4.8
 [root@webserver ~]# ln -s /usr/local/lib/libmhash.a /usr/lib/libmhash.a
 [root@webserver ~]# ln -s /usr/local/lib/libmhash.la /usr/lib/libmhash.la
 [root@webserver ~]# ln -s /usr/local/lib/libmhash.so /usr/lib/libmhash.so
 [root@webserver ~]# ln -s /usr/local/lib/libmhash.so.2 /usr/lib/libmhash.so.2
 [root@webserver ~]# ln -s /usr/local/lib/libmhash.so.2.0.1 /usr/lib/libmhash.so.2.0.1
 ln -s /usr/local/bin/libmcrypt-config /usr/lib64//libmcrypt-config
 [root@webserver ~]# vim /etc/ld.so.conf    #配置文件增加如下内容
  /usr/local/lib
 [root@webserver ~]# ldconfig
D. 下载安装mcrypt库(可实现加密解密功能,即能将明文加密,也要以密文还原)
 [root@webserver ~]# wget https://jaist.dl.sourceforge.net/project/mcrypt/MCrypt/2.6.8/mcrypt-2.6.8.tar.gz
 [root@webserver ~]# tar xf mcrypt-2.6.8.tar.gz -C /usr/local/src/
 [root@webserver ~]# cd /usr/local/src/mcrypt-2.6.8/
 [root@webserver /usr/local/src/mcrypt-2.6.8]# ./configure && make && make install
E. 下载安装libiconv库(常用的编码转换库,支持常用的多种编码之前的转换)
 [root@webserver ~]# wget http://ftp.gnu.org/pub/gnu/libiconv/libiconv-1.14.tar.gz
 [root@webserver ~]# tar xf libiconv-1.14.tar.gz -C /usr/local/src/
 [root@webserver ~]# cd /usr/local/src/libiconv-1.14/
 [root@webserver /usr/local/src/libiconv-1.14]# ./configure --prefix=/usr/local/libiconv && make && make install

若在./configure中有如下报错:
In file included from progname.c:26:0:
./stdio.h:1010:1: error: ‘gets’ undeclared here (not in a function)
 _GL_WARN_ON_USE (gets, "gets is a security hole - use fgets instead");
 ^
make[2]: *** [progname.o] Error 1
make[2]: Leaving directory `/usr/local/src/libiconv-1.14/srclib'
make[1]: *** [all] Error 2
make[1]: Leaving directory `/usr/local/src/libiconv-1.14/srclib'
make: *** [all] Error 2

解决方法:
[root@webserver /usr/local/src/libiconv-1.14]# vim srclib/stdio.in.h +698
删除些行内容
_GL_WARN_ON_USE (gets, "gets is a security hole - use fgets instead");
添加如下内容
#if defined(__GLIBC__) && !defined(__UCLIBC__) && !__GLIBC_PREREQ(2, 16)
 _GL_WARN_ON_USE (gets, "gets is a security hole - use fgets instead");
#endif
F. 下载安装PHP
 [root@webserver ~]# wget http://cn2.php.net/distributions/php-5.6.32.tar.gz
 [root@webserver ~]# tar xf php-5.6.32.tar.gz -C /usr/local/src/
 [root@webserver ~]# cd /usr/local/src/php-5.6.32/
 [root@webserver /usr/local/src/php-5.6.32]# ./configure --prefix=/usr/local/php --with-config-file-path=/usr/local/php/etc --with-mysql --with-mysqli --with-iconv \
 --with-freetype-dir --with-jpeg-dir --with-png-dir --with-zlib --with-libxml-dir --enable-xml --disable-rpath --enable-safe-mode --enable-bcmath --enable-shmop \
 --enable-sysvsem --enable-inline-optimization --with-curl --with-curlwrappers --enable-mbregex --enable-fpm --enable-mbstring --with-mcrypt --with-gd \
 --enable-gd-native-ttf --with-mhash --enable-pcntl --enable-sockets --with-xmlrpc --enable-zip --enable-ftp --with-gettext   --with-libdir=lib6
 [root@webserver /usr/local/src/php-5.6.32]# make && make install                                                         #进行编译安装
 [root@webserver /usr/local/src/php-5.6.32]# cp php.ini-production /usr/local/php/etc/php.ini                             #拷贝配置文件模板
 [root@webserver /usr/local/src/php-5.6.32]# cp /usr/local/php/etc/php-fpm.conf.default /usr/local/php/etc/php-fpm.conf   #拷贝Fastcgi配置文件
 [root@webserver /usr/local/src/php-5.6.32]# grep '^[a-z]' /usr/local/php/etc/php-fpm.conf
  pid = run/php-fpm.pid
  error_log = log/php-fpm.log
  log_level = notice
  emergency_restart_threshold = 0
  emergency_restart_interval = 0
  process_control_timeout = 0
  daemonize = yes
  user = nginx
  group = nginx
  listen = 127.0.0.1:9000
  pm = dynamic
  pm.max_children = 35
  pm.start_servers = 20
  pm.min_spare_servers = 5
  pm.max_spare_servers = 35
 [root@webserver ~]# chown -R nginx.nginx /usr/local/php/

 编译报错:
 configure: error: Don't know how to define struct flock on this system, set --enable-opcache=no
 解决方法:
 [root@webserver /usr/local/src/php-5.6.32]# vim /etc/ld.so.conf.d/local.conf                 #创建此文件加入如下内容
 /usr/local/lib64
 [root@webserver /usr/local/src/php-5.6.32]# ldconfig -v
G. 整合nginx和php
修改nginx配置文件,打开如下注释
[root@webserver ~]# vim /etc/nginx/nginx.conf
        location ~ \.php$ {
            root           html;
            fastcgi_pass   127.0.0.1:9000;
            fastcgi_index  index.php;
            fastcgi_param  SCRIPT_FILENAME  /etc/nginx/html$fastcgi_script_name;               #红色部分为nginx发布站点的绝对路径
            include        fastcgi_params;
        }
三、启动服务
 [root@webserver ~]# nginx
 [root@webserver ~]# /usr/local/php/sbin/php-fpm
 [root@webserver ~]# systemctl start mariadb
 [root@webserver ~]# mysqladmin -uroot password 'guoguo'                                         #配置数据库密码
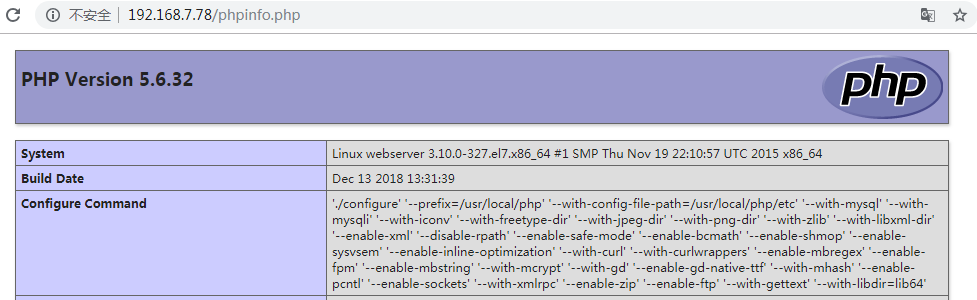
四、LNMP服务验证
 [root@webserver ~]# netstat -lntp
 Active Internet connections (only servers)
 Proto Recv-Q Send-Q Local Address           Foreign Address         State       PID/Program name
 tcp        0      0 127.0.0.1:9000          0.0.0.0:*               LISTEN      31070/php-fpm: mast
 tcp        0      0 0.0.0.0:3306            0.0.0.0:*               LISTEN      31391/mysqld
 tcp        0      0 0.0.0.0:80              0.0.0.0:*               LISTEN      30957/nginx: master
 tcp        0      0 0.0.0.0:22              0.0.0.0:*               LISTEN      836/sshd
 tcp        0      0 0.0.0.0:10050           0.0.0.0:*               LISTEN      849/zabbix_agentd
 tcp6       0      0 :::22                   :::*                    LISTEN      836/sshd
 tcp6       0      0 :::10050                :::*                    LISTEN      849/zabbix_agentd

查看phpinfo:
 [root@webserver ~]# cat /etc/nginx/html/phpinfo.php
<?php
phpinfo();
?>
http://192.168.7.78/phpinfo.php
查看连接MySQL状态:
[root@webserver ~]# cat /etc/nginx/html/mysql.php
<?php
$link=MySQL_connect('127.0.0.1','root','guoguo');
if(!$link) echo 'ERROR!';
else echo 'OK!';
MySQL_close();
?>

五、php安装其它模块
1. 后期需要安装freetds作为PHP连接mssql的扩展,安装freetds
 [root@webserver ~]# wget  http://ibiblio.org/pub/Linux/ALPHA/freetds/stable/freetds-stable.tgz
 [root@webserver ~]# tar xf freetds-stable.tgz -C /usr/local/src/
 [root@webserver ~]# cd /usr/local/src/freetds-0.91/

 #tdsver7.0连接SQL Server 2000
 #tdsver8.0连接SQL Server 2005或2008

 [root@webserver /usr/local/src/freetds-0.91]# ./configure --prefix=/usr/local/freetds0.91 --enable-msdblib --with-tdsver=8.0
 [root@webserver /usr/local/src/freetds-0.91]# make && make install
 [root@webserver ~]# echo "/usr/local/freetds0.91/lib/" > /etc/ld.so.conf.d/freetds.conf          #配置动态连接库
 [root@webserver ~]# ln -s /usr/local/freetds0.91/lib/libsybdb.so.5.0.0 /usr/local/freetds0.91/lib/libsybdb.so.4
 [root@webserver ~]# ldconfig

 [root@webserver /usr/local/freetds0.91/bin]# ./tsql  -C                                          #测试是否安装成功
 Compile-time settings (established with the "configure" script)
                            Version: freetds v0.91
             freetds.conf directory: /usr/local/freetds0.91/etc
     MS db-lib source compatibility: yes
        Sybase binary compatibility: no
                      Thread safety: yes
                      iconv library: yes
                        TDS version: 5.0
                              iODBC: no
                           unixodbc: no
              SSPI "trusted" logins: no
                           Kerberos: no
2. 安装freetds的php扩展
 [root@webserver ~]# cd /usr/local/src/php-5.6.32/ext/mssql/                                        #此目录为PHP源码的安装目录
 [root@webserver /usr/local/src/php-5.6.32/ext/mssql]# /usr/local/php/bin/phpize
 [root@webserver /usr/local/src/php-5.6.32/ext/mssql]# ./configure --with-php-config=/usr/local/php/bin/php-config --with-mssql=/usr/local/freetds0.91/
 [root@webserver /usr/local/src/php-5.6.32/ext/mssql]# make && make install
 [root@webserver ~]# ls /usr/local/php/lib/php/extensions/no-debug-non-zts-20131226/                #php5.4之后已经自动把扩展复制到了此目录
mssql.so  opcache.a  opcache.so
 [root@webserver ~]# vim /usr/local/php/etc/php.ini                                                 #添加扩展配置到php.ini
 extension = '/usr/local/php/lib/php/extensions/no-debug-non-zts-20131226/mssql.so'

 #最后重启web服务即可

3. 安装pdo_dblib模块
 [root@webserver ~]# cd /usr/local/src/php-5.6.32/ext/pdo_dblib/
 [root@webserver /usr/local/src/php-5.6.32/ext/pdo_dblib]# /usr/local/php/bin/phpize
 [root@webserver /usr/local/src/php-5.6.32/ext/pdo_dblib]# ./configure --with-php-config=/usr/local/php/bin/php-config --with-pdo-dblib=/usr/local/freetds0.91/
 [root@webserver /usr/local/src/php-5.6.32/ext/pdo_dblib]# make && make install
 [root@webserver ~]# ls /usr/local/php/lib/php/extensions/no-debug-non-zts-20131226/pdo_dblib.so
 /usr/local/php/lib/php/extensions/no-debug-non-zts-20131226/pdo_dblib.so
 [root@webserver ~]# vim /usr/local/php/etc/php.ini
 [root@webserver ~]# killall php-fpm
 [root@webserver ~]# /usr/local/php/sbin/php-fpm

4. 安装memcached扩展
php的扩展memcache,不支持cas,所以要安装memcached扩展,memcached扩展是基于libmemcached,所以要先安装libmemcached。
A. 先编译安装libmemcached
# wget https://launchpad.net/libmemcached/1.0/1.0.18/+download/libmemcached-1.0.18.tar.gz
# tar xf libmemcached-1.0.18
# cd libmemcached-1.0.18/
./configure --with-memcached --enable-sasl
# make

报错:
clients/memflush.cc: In function ‘int main(int, char**)’:
clients/memflush.cc:42:22: error: ISO C++ forbids comparison between pointer and integer [-fpermissive]
   if (opt_servers == false)
                      ^~~~~
clients/memflush.cc:51:24: error: ISO C++ forbids comparison between pointer and integer [-fpermissive]
     if (opt_servers == false)
                        ^~~~~
make[1]: *** [clients/memflush.o] Error 1
make[1]: Leaving directory `/root/libmemcached-1.0.18'
make: *** [all] Error 2
解决方法:
# vim clients/memflush.cc
替换42和51行的以下内容
if (opt_servers == false)
替换为
if (!opt_servers)

参考链接:https://src.fedoraproject.org/cgit/rpms/libmemcached.git/plain/libmemcached-build.patch
重新编译安装
# make && make install
B. 编译安装php扩展php-memcached,通过这个可以用php来操作memcached
wget http://pecl.php.net/get/memcached-2.2.0.tgz
# tar xf memcache-2.2.7.tgz
# cd memcache-2.2.0/
# /usr/local/php/bin/phpize
# ./configure --enable-memcache --with-php-config=/usr/local/php/bin/php-config --disable-memcached-sasl
# make && make install
加入php.ini中引用memcached.so即可
extension=memcached.so
5. imagick扩展(切图和缩图效果)安装
# wget http://www.imagemagick.org/download/ImageMagick.tar.gz
# tar -xf ImageMagick
# cd ImageMagick-7.0.7-22/
# ./configure --prefix=/usr/local/imagemagick
# make && make install

# wget http://pecl.php.net/get/imagick-3.4.3.tgz
# tar -xf imagick-3.4.3.tgz
# cd imagick-3.4.3
# /usr/local/php/bin/phpize
# ./configure --with-php-config=/usr/local/php/bin/php-config --with-imagick=/usr/local/imagemagick
# make && make install
6. 安装redis扩展
# wget http://pecl.php.net/get/redis-3.1.0.tgz
# tar xf redis-3.1.0.tgz
# cd redis-3.1.0
# /usr/local/php/bin/phpize
# ./configure --with-php-config=/usr/local/php/bin/php-config
# make && make install
# echo "extension=redis.so" >> /usr/local/webserver/php/etc/php.ini
7.安装yar扩展
# wget http://pecl.php.net/get/yar-1.1.1.tgz
# tar xf yar-1.1.1.tgz
# cd yar-1.1.1
# /usr/local/webserver/php/bin/phpize
# ./configure --with-php-config=/usr/local/webserver/php/bin/php-config
# make & make install
# echo "extension=yar.so" >> /usr/local/webserver/php/etc/php.ini
8. 安装openssl扩展
# cd php-5.4.24/ext/openssl/
# 运行phpize有如何报错,找不到config.m4
# /usr/local/webserver/php-5.4.24/bin/phpize
Cannot find config.m4.
Make sure that you run '/usr/local/webserver/php-5.4.24/bin/phpize' in the top level source directory of the module
# 解决办法:
# ls
config0.m4  config.w32  CREDITS  openssl.c  openssl.dsp  openssl.mak  php_openssl.h  README  tests  xp_ssl.c
# mv config0.m4 config.m4
# /usr/local/webserver/php-5.4.24/bin/phpize
# ./configure --with-php-config=/usr/local/webserver/php-5.4.24/bin/php-config
# make && make install
# echo "extension = openssl.so" >> /usr/local/webserver/php/etc/php.ini
9. 安装pdo_mysql扩展
# cd php-5.4.24/ext/pod_mysql/
# /usr/local/webserver/php-5.4.24/bin/phpize
# ./configure --with-php-config=/usr/local/webserver/php-5.4.24/bin/php-config
# make && make install
# echo "extension = pod_mysql.so" >> /usr/local/webserver/php/etc/php.ini